When installing a new ceiling in your basement, consider these common options of drop, drywall, and exposed.

You're standing in your unfinished basement, looking up at the maze of floor joists, ductwork, electrical conduit, and plumbing pipes crisscrossing the ceiling. You're ready to transform this space into the entertainment area your family has been dreaming about. But one decision will affect every other aspect of your basement finishing project: what do you do with that ceiling?
This isn't just an aesthetic choice. Your ceiling decision impacts your budget by $5,000 to $15,000, determines whether you can access utilities without tearing out materials, affects how sound travels between floors, and influences how tall your finished basement feels. Choose wrong, and you'll regret it every time you look up—or worse, every time you need to repair a pipe hidden behind drywall.
After completing 586+ basement finishing projects across Savage, Lakeville, Apple Valley, and the South Metro, we've installed every ceiling type imaginable. We've seen homeowners make brilliant choices that perfectly suit their needs and lifestyle—and we've seen expensive mistakes that required complete ceiling replacement within a few years.
This comprehensive guide walks through everything Savage and South Metro homeowners need to know about basement ceiling options: the three main approaches (drop ceilings, drywall, and exposed), their costs, advantages, drawbacks, code requirements, and how to choose the right solution for your specific basement and goals.
Ceiling choices represent 10-15% of your total basement finishing budget. On a $100,000 basement project, that's $10,000-$15,000—enough to make or break your budget.
Cost per square foot ranges:
For a typical 1,000 square foot basement, these differences translate to:
The $2,000-$6,000 difference between approaches could fund upgraded flooring, a larger custom bar, or premium bathroom finishes.
Basements house critical home systems: HVAC ductwork, plumbing pipes, electrical wiring, network cables, and sometimes gas lines. Eventually, something will need repair, replacement, or modification.
With drop ceilings: Pop out a tile, make your repair, replace the tile. Total disruption: minimal.
With drywall ceilings: Cut through drywall, make repairs, patch and repaint affected areas. Cost: $500-$2,000 per incident depending on damage extent. Disruption: significant.
With exposed ceilings: Access everything easily. Zero additional cost for ceiling removal and repair.
This access question becomes critical when you consider that the average home requires 2-3 plumbing repairs over 20 years, periodic HVAC modifications, and occasional electrical updates. A decision that seems minor today affects costs and convenience for decades.
Sound travels between floors through ceiling assemblies. Without proper treatment, footsteps from the main floor sound like elephants stampeding through your basement home theater.
Different ceiling types provide dramatically different sound control:
If your basement will include home theaters, guest bedrooms, or work-from-home offices, acoustic performance matters significantly.
Minnesota building code requires minimum ceiling heights for habitable spaces. Your ceiling choice affects whether your basement meets these requirements.
IRC Section R305.1 minimum ceiling heights:
How ceiling types affect height:
In basements with 7-foot floor-to-joist measurements, drop ceilings may not meet code. Exposed or drywall options become necessary rather than optional.
Basement ceilings dramatically affect how spaces feel and function. A poorly chosen ceiling can make a $120,000 basement remodel feel unfinished or cheap, while the right choice enhances the entire space.
Design considerations:
South Metro home buyers increasingly expect finished basements to feel like natural extensions of main-level living spaces. Ceiling choices that reinforce or undermine this perception affect resale value and market appeal.
Drop ceilings (also called suspended ceilings) remain popular for basement applications despite aesthetic criticisms. Understanding their advantages and limitations helps homeowners make informed decisions.
Drop ceiling systems suspend a metal grid framework from ceiling joists using adjustable wires. Lightweight panels (typically 2x2 feet or 2x4 feet) rest in the grid, creating a modular ceiling that conceals mechanicals while providing easy access.
System components:
Main runners: Primary support beams spanning the room's length, typically 12 feet long
Cross tees: Perpendicular supports creating the grid pattern, in 2-foot or 4-foot lengths
Wall molding: L-shaped trim securing the grid perimeter
Hanger wires: Adjustable wires supporting the grid from joists above
Ceiling tiles/panels: Lightweight panels dropping into grid openings
Optional recessed lighting: Integrated fixtures designed for drop ceiling systems
Installation involves leveling the grid at the desired height (minimum 3 inches below the lowest obstruction), securing it properly, and dropping panels into place.
Modern drop ceiling tiles have evolved far beyond the institutional-looking white tiles most people envision.
Standard mineral fiber tiles ($0.50-$2 per sq ft):
Premium acoustical tiles ($2-$5 per sq ft):
Designer tiles with visual interest ($3-$8 per sq ft):
Vinyl-coated tiles ($2-$4 per sq ft):
At Country Creek Builders, we've seen the dramatic difference between budget tiles and premium options in finished basements. Spending an extra $1-2 per square foot on tiles often transforms a drop ceiling from "acceptable" to "attractive."
Unmatched utility access: This advantage alone makes drop ceilings the preferred choice for many homeowners. Need to run network cables for a new office space? Pop out tiles, run cables, replace tiles. Plumbing leak requires pipe repair? Remove affected tiles, make repairs, reinstall tiles. Total cost: zero beyond the actual repair.
We've worked with countless homeowners who initially wanted drywall ceilings for aesthetics, then reconsidered after understanding the long-term access implications. One Savage homeowner specifically told us, "We're glad we went with drop ceilings—we've had two plumbing repairs and added recessed lights without any ceiling damage or repair costs."
Superior acoustic performance: Quality acoustic ceiling tiles absorb sound effectively, reducing noise transmission between floors. The air gap between tiles and floor joists adds additional sound dampening.
For basement home theaters, this matters significantly. Drop ceilings with premium acoustic tiles (NRC ratings of 0.70-0.85) dramatically reduce the sound of footsteps, voices, and activity from main floors disturbing movie viewing.
Cost-effective solution: Drop ceilings typically cost less than drywall installations, especially in basements with complex mechanicals requiring extensive soffits if drywall were used.
Material costs stay reasonable, and installation proceeds quickly. Experienced installers complete 1,000 square feet in 2-3 days, while comparable drywall ceilings require 4-5 days plus additional time for mudding, sanding, and painting.
Integrated lighting options: Recessed lighting designed specifically for drop ceiling grids simplifies electrical work and provides clean, professional appearance.
These fixtures drop into the grid like tiles, eliminating the need for cutting openings, can sizing, and trim work required for drywall applications. Adding lights later becomes straightforward—just replace a tile with a lighting fixture.
Conceals imperfect joists: Many older South Metro homes have floor joists that aren't perfectly level or straight. Drop ceiling grids create level, uniform surfaces regardless of what's happening above.
Drywall installations require extensive shimming and framing to create level surfaces when joists are uneven—adding substantial labor costs. Drop ceilings solve this problem inherently through their adjustable hanger system.
Easy modifications: Homeowner priorities change over time. The gaming room becomes a home office, requiring additional electrical outlets and network connections. The entertainment area expands to include a bar, needing plumbing lines.
Drop ceilings accommodate these changes without ceiling damage. Remove tiles where work is needed, make modifications, replace tiles. Compare this to drywall, where modifications require cutting, patching, texturing, and repainting—easily $1,000-$3,000 per significant modification.
Aesthetic limitations: Despite improvements in tile designs, drop ceilings struggle to achieve the refined residential appearance of drywall. The visible grid system and modular nature create an institutional or commercial feel that some homeowners find objectionable.
This matters more in living spaces (family rooms, bedrooms, home offices) than in utility areas (mechanical rooms, storage). We often see homeowners combine ceiling types—drop ceilings in mechanical areas and drywall in main living spaces.
Height reduction: Drop ceiling systems reduce ceiling height by 3-4 inches minimum. In basements where every inch matters for code compliance or comfortable feel, this limitation can be significant.
The combination of grid framework (1.5-2 inches) plus the need to hang below the lowest obstruction (often ductwork or pipes) means typical installations sit 3-4 inches below joists. Basements with 7-foot clear heights may not accommodate drop ceilings and meet building code requirements.
Tile damage concerns: Individual tiles can be damaged, sagging, or stained by water leaks. While replacing individual tiles is easy, maintaining a uniform appearance requires keeping extra tiles in stock for repairs.
Colors fade over time, and discontinued tile patterns may not be replaceable with exact matches. This creates patchwork appearances when older tiles are replaced with newer versions.
Humidity vulnerability: Standard mineral fiber tiles absorb moisture in humid basement environments, causing sagging, staining, or deterioration. While premium tiles resist moisture better, humid conditions remain problematic without proper basement dehumidification.
South Metro basements with inadequate humidity control often develop drop ceiling problems within 2-3 years: tiles sag in corners, water stains appear from condensation, and warping creates uneven surfaces. This emphasizes the importance of comprehensive moisture management in finished basements.
Grid system visibility: The metal grid remains visible regardless of tile quality. Some homeowners accept this as part of the system's character; others find it detracts from residential aesthetics they're trying to achieve.
Designer tiles with interesting patterns or textures minimize grid visibility by drawing eyes to the tiles themselves rather than the framework. Budget tiles with plain white surfaces make grids more prominent.
Understanding complete drop ceiling costs prevents budget surprises during basement finishing projects.
Material costs (1,000 sq ft basement):
Grid system components: $500-$800
Ceiling tiles:
Lighting fixtures (12 fixtures): $600-$2,400
Total material cost: $1,600-$11,200 depending on tile selection and lighting choices
Labor costs (1,000 sq ft basement):
Installation labor: $2,000-$4,000
Electrical rough-in (if needed): $500-$1,500
Total installed cost (1,000 sq ft): $4,100-$16,700
Practical cost expectations:
These costs assume straightforward installations without significant complications. Basements with extremely low clearances, complex mechanical systems, or difficult access may incur additional charges.
Drop ceilings aren't right for every basement finishing project, but they're the optimal choice in specific situations.
Ideal scenarios for drop ceilings:
Basements with extensive mechanicals: Homes with complex HVAC systems, extensive plumbing, or considerable electrical conduit benefit from easy access drop ceilings provide. We frequently recommend drop ceilings in these situations because the cost to build soffits around all mechanicals would exceed drop ceiling costs.
Budget-conscious projects: When basement finishing budgets are tight, drop ceilings save $1,000-$4,000 compared to drywall installations—money that can be redirected to better flooring, upgraded fixtures, or enhanced finishes in visible areas.
DIY-friendly projects: Homeowners with basic handyman skills can install drop ceiling systems themselves, saving substantial labor costs. Drywall installation and finishing requires more specialized skills that most DIYers lack.
Home theaters and media rooms: The acoustic benefits of drop ceiling tiles make them excellent choices for spaces where sound control matters. Premium acoustic tiles (NRC 0.70-0.85) dramatically improve viewing experiences by reducing ambient noise from main floors.
Basements with anticipat frequent modifications: If you envision adding smart home systems, upgrading network infrastructure, or modifying mechanical systems over time, drop ceiling access becomes increasingly valuable.
Mechanical and utility rooms: Spaces housing furnaces, water heaters, electrical panels, and utility equipment benefit from drop ceilings' easy access and cost-effectiveness. Aesthetic concerns matter less in these functional spaces.
Rental properties: Landlords appreciate drop ceiling durability and easy maintenance. Damaged tiles can be replaced quickly and inexpensively without special skills or disrupting tenants significantly.
At Country Creek Builders, we've installed drop ceilings in approximately 30% of our basement finishing projects. They're particularly common in finished basements that include substantial mechanical rooms or home theaters where acoustic performance matters.
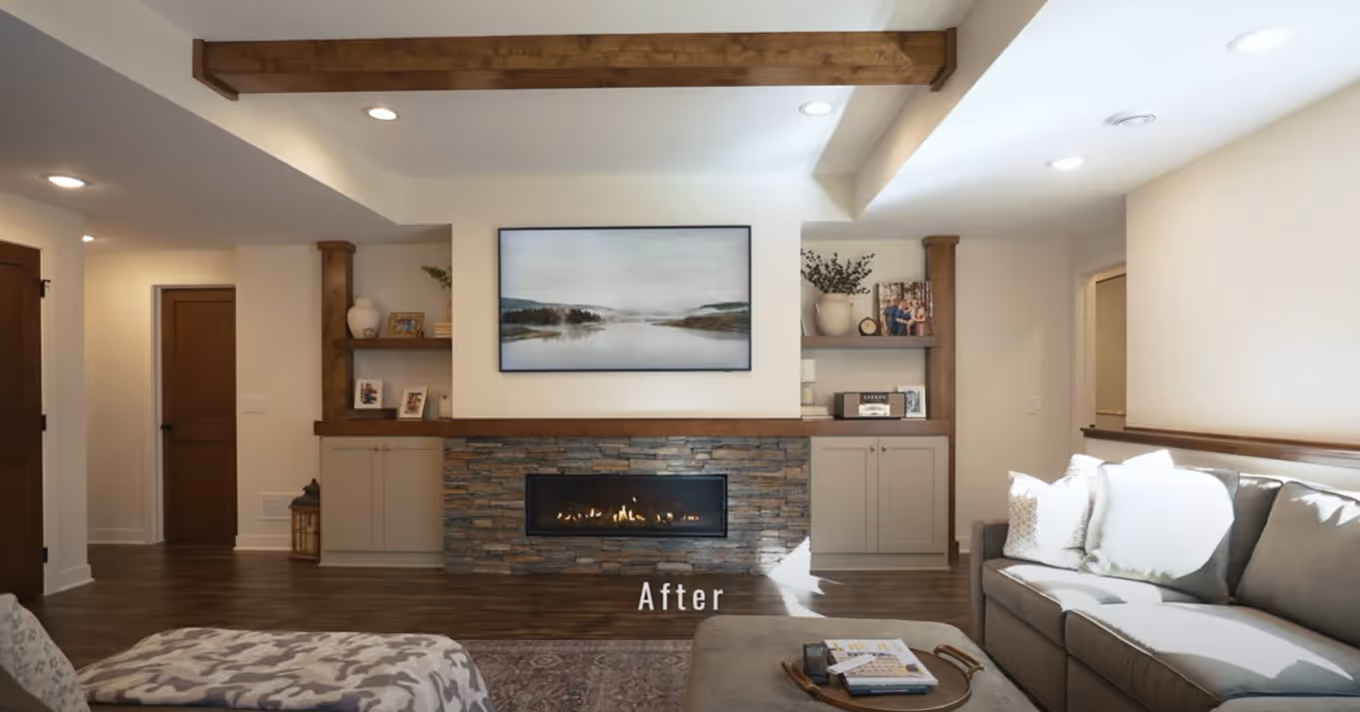
Drywall ceilings provide the clean, seamless appearance homeowners associate with quality residential construction. Understanding their benefits and challenges helps determine whether they're worth the premium cost.
Drywall ceiling installations create flat, continuous surfaces by attaching drywall sheets to ceiling joists or furring strips. The process involves more steps and specialized skills than drop ceiling installation.
Installation process:
Step 1: Evaluate existing conditions
Step 2: Frame soffits around obstructions
Step 3: Install furring strips if needed
Step 4: Install drywall sheets
Step 5: Tape and mud
Step 6: Texture (if desired)
Step 7: Prime and paint
This labor-intensive process requires 5-7 days for typical basements plus drying time between coats—substantially longer than drop ceiling installations.
Standard 1/2-inch drywall ($0.40-$0.60 per sq ft):
5/8-inch drywall ($0.50-$0.75 per sq ft):
Moisture-resistant drywall ($0.60-$0.90 per sq ft):
Mold-resistant drywall ($0.75-$1.25 per sq ft):
At Country Creek Builders, we typically specify 1/2-inch moisture-resistant drywall for standard basement finishing and upgrade to 5/8-inch in home theaters or spaces where superior sound control matters.
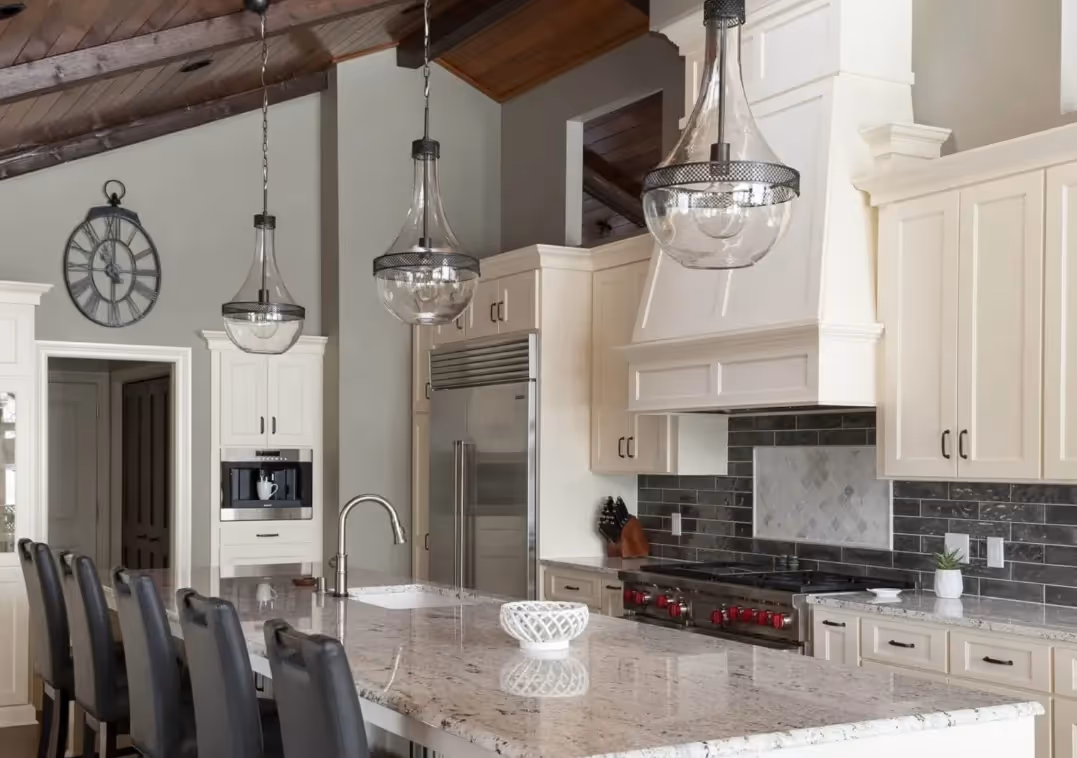
Premium residential aesthetic: Drywall creates the clean, seamless appearance homeowners expect in quality living spaces. The continuous surface matches main-level ceilings, making basements feel like natural extensions of the home rather than separate lower-level spaces.
This aesthetic advantage justifies the premium cost for many homeowners. We consistently hear feedback like, "Our basement feels just like another floor of our house—guests don't even realize they're in a basement."
Design flexibility: Drywall ceilings accommodate virtually any design vision:
Drop ceilings and exposed options can't match this design versatility. Homeowners wanting sophisticated architectural details find drywall necessary rather than optional.
Minimal height loss: Drywall attached directly to joists reduces ceiling height by only 1/2 inch (the drywall thickness). Even installations using furring strips typically reduce height by only 1-2 inches—significantly less than drop ceiling's 3-4 inch reduction.
In basements where ceiling height is marginal, this difference determines whether spaces meet code requirements and feel comfortable or feel cramped and claustrophobic.
Durability and longevity: Properly installed drywall ceilings last 30-50+ years without replacement. Unlike drop ceiling tiles that can sag, stain, or fade, drywall maintains appearance with only occasional repainting.
The initial higher investment amortizes over decades of maintenance-free performance.
Sound control potential: Drywall ceiling installations with proper insulation provide excellent sound blocking (STC ratings of 40-50 or higher). Adding sound-dampening insulation above drywall creates quieter basements than drop ceilings can achieve.
For basement bedrooms or work-from-home offices, this sound isolation creates comfortable spaces unaffected by main-floor activity.
Paint color flexibility: Drywall accepts any paint color, allowing perfect coordination with overall design schemes. Want the ceiling to match your walls? Easy. Prefer contrasting colors? No problem. This flexibility supports cohesive design visions.
Increased home value: South Metro homebuyers increasingly expect basement finishes comparable to main floors. Drywall ceilings contribute to this perception of quality, potentially increasing resale values and appeal to discerning buyers.
Higher installation cost: Drywall ceiling installations cost 30-50% more than comparable drop ceiling systems. On 1,000 square foot basements, this translates to $1,500-$4,000 additional expense—significant when budgets are tight.
Labor intensity drives costs. The taping, mudding, sanding, and painting process requires specialized skills and multiple days of work compared to drop ceiling's straightforward installation.
Utility access problems: This disadvantage becomes costly over time. Every plumbing repair, electrical modification, or HVAC adjustment requires cutting drywall, completing repairs, patching holes, texturing patches to match existing surfaces, and repainting affected areas.
We've worked with homeowners who spent $1,500-$3,000 repairing drywall ceilings after routine plumbing work—costs that would have been zero with drop ceiling tiles. Over 20-30 years of homeownership, these expenses accumulate.
Future modification challenges: Life changes create basement modification needs: adding a home office requires network cabling; finishing an unfinished section needs HVAC ductwork extension; smart home upgrades need additional wiring.
Drywall ceilings make these modifications expensive and disruptive. We frequently hear from homeowners who initially chose drywall ceilings, then regretted that decision when modifications required cutting, patching, and repainting large ceiling sections.
Soffit requirements: Basements with substantial ductwork, plumbing, or electrical often require multiple soffits to conceal utilities when using drywall ceilings. These boxed-in areas reduce ceiling height, create visual clutter, and add framing costs.
Drop ceilings avoid this problem by accommodating utilities within their suspended framework. The cost to frame, drywall, and finish extensive soffits can exceed what you'd save by choosing drywall over drop ceilings.
Longer installation timeline: Drywall ceiling installations require 5-7 days plus drying time between mud coats—potentially 2-3 weeks from start to final paint. Drop ceilings complete in 2-3 days.
For homeowners eager to use their finished basements quickly, this timeline difference matters.
Skill requirements: Quality drywall finishing requires substantial skill. Poor taping and mudding creates visible seams, uneven surfaces, and amateur appearance. Most homeowners lack these skills, making professional installation necessary.
Drop ceilings, by contrast, are DIY-friendly for homeowners with basic handyman capabilities.
Cracking potential: Drywall ceilings can develop cracks at seams or from settling. While cosmetic repairs are possible, perfect matches to existing texture and paint colors prove difficult. Small cracks often remain visible even after repair.
Comprehensive cost understanding prevents budget surprises during basement finishing.
Material costs (1,000 sq ft basement):
Drywall sheets: $400-$800
Joint compound and tape: $100-$200
Fasteners and supplies: $50-$100
Primer and paint: $200-$400
Furring strips (if needed): $200-$400
Soffit framing materials: $300-$1,500
Total material cost: $1,250-$3,400 depending on conditions and material quality
Labor costs (1,000 sq ft basement):
Hanging and finishing: $3,000-$6,000
Soffit framing: $500-$2,000
Painting: $800-$1,500
Total installed cost (1,000 sq ft): $5,550-$12,900
Practical cost expectations:
These estimates assume standard basement conditions. Extremely low ceiling heights, extensive mechanical systems, or design complications increase costs.
Drywall isn't always worth the premium, but it's the optimal choice in specific situations.
Ideal scenarios for drywall ceilings:
Premium finishing with aesthetics priority: Homeowners investing $120,000+ in high-end basement finishing often choose drywall to maintain consistent quality throughout. The ceiling contributes significantly to overall impression; drywall delivers the refined appearance premium finishes deserve.
Open-concept basements: Large open spaces without many utility obstructions benefit from drywall's clean, continuous appearance. Fewer soffits are needed, reducing the cost disadvantage vs. drop ceilings.
Matching main floor aesthetics: When basements are designed as true extensions of main living spaces—guest suites, rental apartments, in-law quarters—matching ceiling finishes to main floors creates cohesive design.
Adequate ceiling height: Basements with 8+ feet of floor-to-joist clearance can afford drywall's minimal height reduction while maintaining comfortable proportions.
Minimal anticipated changes: Homeowners confident their basement layout won't require significant modifications can justify drywall despite utility access limitations.
Architectural design elements: Plans incorporating tray ceilings, coffered details, or other architectural features require drywall's construction flexibility.
Sound isolation priorities: High-performance sound control (home theaters, recording studios, work offices) benefits from drywall's superior STC ratings when properly insulated.
At Country Creek Builders, approximately 60% of our basement finishing projects use drywall ceilings in at least primary living areas. The refined appearance aligns with the quality expectations of homeowners investing $85,000-$140,000+ in basement transformations.
Exposed ceilings—where floor joists, ductwork, and utilities remain visible—have gained popularity as homeowners embrace industrial and contemporary design aesthetics.
Exposed ceiling approaches leave structural and mechanical elements visible while treating surfaces to create intentional, designed appearance rather than unfinished look.
Key elements:
Floor joist treatment:
Mechanical system treatment:
Subfloor treatment:
Lighting integration:
Color schemes:
The goal: create intentional design that looks purposeful rather than simply unfinished.
Fully exposed painted: Everything visible receives uniform paint treatment, typically black or dark gray. This creates cohesive appearance and masks various materials (wood, metal, plastic) as single design element.
Selectively exposed: Some elements remain visible and treated (joists, large ducts) while small pipes and wiring are concealed in strategic soffits. This hybrid approach balances industrial aesthetic with practical concerns.
Exposed with accent lighting: Joists and mechanicals left natural or lightly treated, with focus on creative lighting solutions (LED strips, track systems, pendants) drawing attention and adding functionality.
Wood-focused exposed: Emphasis on natural wood joist beauty through staining and sealing rather than painting. Works particularly well when joists are attractive hardwood rather than construction-grade lumber.
Maximum ceiling height retention: Exposed approaches add zero height loss—you gain the full distance from floor to underside of main floor decking. In basements with limited clearance, this creates the most spacious feel possible.
Basements measuring exactly 7 feet from floor to joists meet code requirements only with exposed ceilings. Drop ceilings would reduce height below the 7-foot minimum; drywall would barely meet requirements.
Contemporary aesthetic appeal: Industrial and modern design trends embrace exposed structural elements. When executed well, exposed ceilings create sophisticated, intentional appearance that appeals to design-conscious homeowners.
We've completed basement finishing projects in Savage and Lakeville where exposed ceilings became showpiece features—homeowners specifically requested the look and appreciated the contemporary vibe it created.
Lowest material cost: Exposed ceilings require minimal materials—primarily paint for treating visible surfaces. This saves $1,000-$4,000 compared to drywall installations or $500-$2,000 compared to drop ceilings.
Budget-conscious homeowners can redirect these savings toward premium flooring, upgraded bathrooms, custom cabinetry, or other high-impact improvements.
Ultimate utility access: Every utility remains completely accessible without removing ceiling materials. Need to run new electrical circuits? Do it. Modify HVAC ductwork? Simple. Add plumbing for a future bar? No problem.
This advantage becomes increasingly valuable as homes age and technology evolves. Smart home systems, network infrastructure upgrades, and mechanical improvements happen easily without ceiling damage or repair costs.
Faster installation timeline: Exposed ceiling treatment (cleaning, painting, lighting installation) completes in 2-3 days compared to 3-4 days for drop ceilings or 7-14 days for drywall. Projects finish faster, allowing earlier basement use.
Flexible lighting design: Exposed structures accommodate creative lighting approaches difficult or impossible with closed ceilings:
Easy modifications: Like drop ceilings but even better, exposed ceilings facilitate future changes. Add recessed lighting? Mount anywhere. Relocate speakers? Simple. Integrate smart home devices? Easy access.
Aesthetic not universally appealing: Exposed ceilings work wonderfully in contemporary, industrial, or loft-inspired designs but clash with traditional aesthetics. Not every homeowner appreciates the look, and some buyers view exposed ceilings as "unfinished" regardless of execution quality.
This matters for resale. South Metro buyers shopping for traditional family homes may not appreciate exposed basement ceilings even in otherwise beautiful finished basements.
Poor sound control: Exposed ceilings provide minimal sound blocking between floors. Every footstep, conversation, and activity on main floors transmits clearly to basements below.
STC ratings typically measure 20-30 for untreated exposed ceilings—significantly lower than drop ceilings (35-45) or insulated drywall (40-50). For home theaters, bedrooms, or offices where sound control matters, exposed ceilings create problems.
Adding insulation between joists improves performance (STC 35-40) but increases costs and partially defeats the exposed aesthetic.
Visible imperfections: Everything shows. Damaged joists, uneven framing, sloppy plumbing installations, disorganized wiring—all remain visible no matter how well you paint.
Older South Metro homes often have decades of ad-hoc modifications creating visual chaos in ceiling spaces. Cleaning this up requires substantial effort:
Dust accumulation: Exposed surfaces collect dust on all sides—joists, ductwork, pipes. Cleaning requires more effort than smooth drywall or drop ceiling surfaces.
Limited thermal insulation: Exposed ceilings don't add insulation between floors (unless specifically installed). This can increase heating/cooling costs and create temperature differences between basement and main floor.
Lighting limitations: While creative lighting is possible, achieving uniform illumination across rooms proves more challenging than with closed ceilings and recessed lighting. Exposed ceilings typically have brighter spots (near fixtures) and darker areas between joists.
Height requirements: Despite retaining maximum height, exposed ceilings only work in basements meeting 7-foot minimum clearances. Lower basements still fail code requirements.
Understanding exposed ceiling costs shows potential savings vs. alternatives.
Material costs (1,000 sq ft basement):
Paint and primer: $300-$600
Cleaning supplies: $50-$100
Minor repairs: $100-$300
Lighting fixtures: $500-$2,000
Wiring organization: $100-$300
Total material cost: $1,050-$3,300
Labor costs (1,000 sq ft basement):
Cleaning and preparation: $500-$1,000
Painting: $1,000-$2,500
Lighting installation: $500-$1,500
Total installed cost (1,000 sq ft): $3,050-$8,300
Practical cost expectations:
These costs assume basements with reasonably organized mechanicals and decent structural conditions. Extensive cleanup, major repairs, or complex wiring modifications increase expenses.
Exposed ceilings aren't right for every basement, but they're optimal choices in specific circumstances.
Ideal scenarios for exposed ceilings:
Contemporary or industrial design themes: Homes with modern aesthetics benefit from exposed ceilings' industrial character. The look complements contemporary furnishings, clean lines, and minimalist design approaches.
Limited ceiling height: Basements with 7-7.5 feet floor-to-joist measurements can't accommodate drop ceilings and barely handle drywall. Exposed approaches provide code-compliant solutions while maximizing the sense of space.
Budget-conscious projects: Saving $1,500-$5,000 on ceiling costs allows investing in higher-impact areas. We often see budget-minded basement finishing projects use exposed ceilings to stay within financial constraints while creating attractive spaces.
Basements requiring maximum utility access: Homeowners planning significant future modifications, smart home integrations, or technological upgrades benefit from exposed ceilings' permanent, easy access.
Renovation-focused properties: In rental properties, flip projects, or homes where basement function trumps aesthetics, exposed ceilings provide quick, cost-effective solutions.
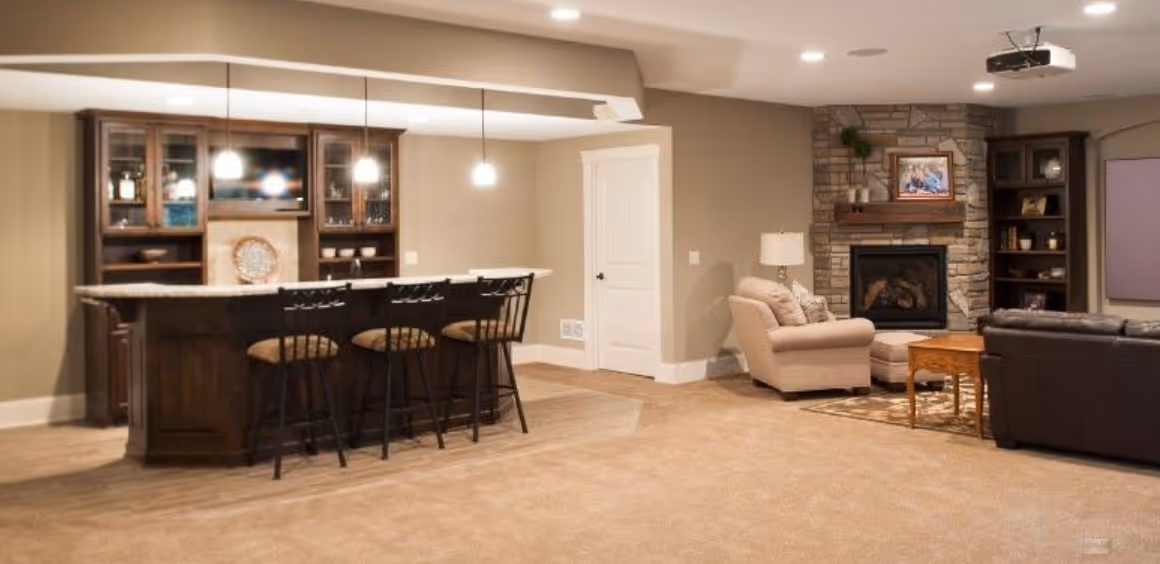
Bars and entertainment spaces: Exposed ceilings work particularly well in basement bars, game rooms, and casual entertainment areas where industrial vibe enhances the atmosphere.
Finished basements with well-organized mechanicals: New or recently-renovated homes with neat, organized ceiling utilities present ideal conditions for exposed treatments. Older homes with chaotic ceiling spaces require extensive cleanup making exposed approaches less practical.
At Country Creek Builders, approximately 10% of our basement finishing projects utilize exposed ceiling designs. They work brilliantly in the right contexts but remain specialized solutions rather than universal approaches.
Many homeowners discover optimal solutions by combining ceiling types strategically rather than choosing one approach for entire basements.
Drywall in living areas, drop ceilings in mechanical spaces: This popular hybrid provides premium aesthetics where guests see it while maintaining practical utility access where needed.
A typical application: Drywall ceilings in the family room, bedrooms, and bathroom create refined residential appearance. Drop ceilings in the mechanical room, storage areas, and utility corners provide easy equipment access.
Cost impact: Moderate—you pay drywall premiums only for high-visibility areas while saving money in utility spaces.
Exposed in entertainment areas, drywall in bedrooms: Industrial aesthetics work well in casual spaces (bars, game rooms, home theaters for design-forward homeowners) while bedrooms benefit from drywall's sound control and traditional appearance.
Drop ceilings with designer tiles in main areas, standard tiles in utility areas: Budget-conscious approach that concentrates premium materials where they show most while using economical solutions in less-visible locations.
Drywall with strategic access panels: Predominantly drywall installation with removable access panels providing utility access at critical locations (over shut-off valves, electrical junction boxes, water heaters).
Successfully combining ceiling types requires thoughtful transitions preventing awkward visual breaks.
Effective transition strategies:
Define zones with architectural elements: Use walls, half-walls, or columns defining distinct areas. Different ceiling types on either side of these dividers feel intentional rather than disjointed.
Example: A wall separating the basement bar from the entertainment area allows exposed ceiling in the bar (industrial vibe) and drywall in the entertainment area (refined comfort).
Use soffits as transition elements: Strategic soffits marking boundaries between ceiling types create smooth visual transitions. A soffit running along the division point frames the transition as intentional design feature.
Maintain consistent ceiling heights at transitions: Abrupt height changes between ceiling types create jarring visual effects. Maintain consistent heights across transitions or use gradual level changes to ease transitions.
Coordinate colors across ceiling types: Even different ceiling types feel cohesive when colors coordinate. White drywall and white drop ceiling tiles, or black exposed structure with dark gray drywall, maintain visual harmony.
Consider sight lines: Analyze which ceiling types are visible simultaneously from key viewpoints. Areas seen together should complement each other aesthetically.
At Country Creek Builders, we help homeowners plan ceiling transitions during design phases, creating finished basements that feel cohesive despite combining different ceiling approaches in strategic locations.
Understanding code requirements prevents compliance problems during inspections and ensures safe, legal finished basements.
IRC Section R305.1: Habitable rooms shall have a floor-to-ceiling height of not less than 7 feet.
Exceptions:
Practical application:
Drop ceilings: Need 7 feet 3-4 inches floor-to-joist measurement to meet code after 3-4 inch height reduction
Drywall ceilings: Need 7 feet 1-2 inches floor-to-joist measurement to meet code after 1-2 inch height reduction
Exposed ceilings: Need exactly 7 feet floor-to-joist measurement to meet code
Savage and South Metro building inspectors measure ceiling heights during final inspections. Non-compliance requires corrections before certificates of occupancy are issued—potentially meaning complete ceiling replacement if your chosen approach doesn't meet requirements.
IRC Section R302.13: Duct penetrations through fire-resistant assemblies must maintain fire ratings.
Basement ceilings may serve as fire-resistance-rated assemblies separating habitable spaces from combustion equipment. Requirements vary based on:
Type X drywall: Required in some fire-rated applications. 5/8-inch Type X drywall provides one-hour fire rating, while standard 1/2-inch drywall does not.
Drop ceilings and exposed ceilings typically don't provide fire-rated assemblies. Homes requiring fire separation may need alternative solutions or dedicated mechanical rooms with fire-rated enclosures.
IRC Sections R314 and R315: Minnesota requires smoke detectors and carbon monoxide detectors in specific locations regardless of ceiling type.
Placement requirements:
Ceiling type affects installation:
Plan detector locations during ceiling design to ensure code compliance and functional coverage.
Minnesota Electrical Code: Requires proper wiring methods, junction box access, and safe electrical installations regardless of ceiling type.
Critical requirements:
Junction box access: All electrical junction boxes must remain accessible. Drywall installations that would cover junction boxes require relocating boxes or installing access panels.
Proper wiring methods: Exposed wiring in open ceilings must use appropriate methods (conduit or proper cable support) rather than simply draping wires between joists.
GFCI requirements: Outlets in damp or unfinished areas (near bathrooms, bars with sinks) require GFCI protection regardless of ceiling type.
Building inspectors verify electrical compliance during rough-in and final inspections. Plan carefully to avoid expensive corrections.
Sound transmission between floors affects basement comfort and functionality. Understanding acoustic principles helps choose appropriate ceiling solutions.
STC (Sound Transmission Class) ratings measure how well assemblies block sound. Higher ratings indicate better sound blocking:
Basement ceiling assemblies typically achieve:
Drop ceiling enhancement:
Cost: $1-3 per sq ft for acoustic tile upgrades; $500-$1,000 for insulation addition
Drywall ceiling enhancement:
Cost: $2-5 per sq ft for comprehensive sound treatment
Exposed ceiling enhancement:
Cost: $1.50-4 per sq ft depending on approach
For basement home theaters or spaces where sound control is critical, comprehensive acoustic treatment delivers worthwhile results. Standard basements typically function adequately with basic acoustic consideration built into ceiling selection.
With comprehensive information about all ceiling options, apply this framework for confident decisions.
Measure floor-to-joist clearance at the lowest points:
Calculate realistic ceiling budget as percentage of total basement finishing cost:
Specific budget ranges for 1,000 sq ft:
Assess your basement's mechanical complexity:
Evaluate modification likelihood:
Identify your design vision:
Consider resale implications:
Assess sound control needs:
With ceiling height, budget, access needs, aesthetics, and acoustics considered, your optimal choice becomes clear.
Decision matrix examples:
Scenario 1: 7-foot ceiling height, $90,000 basement budget ($9,000 ceiling budget), complex mechanicals, traditional aesthetics, home theater included.Recommendation: Hybrid approach—drywall with sound treatment in theater, drop ceilings elsewhere. Ceiling height limits drop ceiling in some areas; drywall in theater provides sound control; drop ceilings in other areas provide utility access.
Scenario 2: 8-foot ceiling height, $120,000 basement budget ($15,000 ceiling budget), simple mechanicals, contemporary aesthetics, open entertainment space.Recommendation: Drywall throughout. Adequate height for any option; generous budget supports premium finish; simple mechanicals make access less critical; contemporary aesthetic achieved through lighting and design rather than exposed structure.
Scenario 3: 7 feet 2 inches ceiling height, $85,000 basement budget ($8,500 ceiling budget), moderate mechanicals, practical focus, family room and bedroom.Recommendation: Drop ceiling with premium acoustic tiles. Height marginal for code compliance with drop ceiling but adequate; budget moderate; utility access valuable; premium tiles provide both attractive appearance and sound control.
Scenario 4: 7 feet even ceiling height, $100,000 basement budget ($10,000 ceiling budget), extensive mechanicals, industrial aesthetic, open bar and entertainment area.Recommendation: Exposed ceiling throughout. Height requires exposed to meet code; budget allows quality treatment; industrial aesthetic suits space function; easy utility access valuable for complex systems.
At Country Creek Builders, we guide homeowners through this decision-making process during initial basement finishing consultations, ensuring ceiling choices align with budgets, goals, and practical requirements.
Maybe. Drop ceilings reduce height by 3-4 inches. If your floor-to-joist measurement is less than 7 feet 3 inches, drop ceilings likely won't meet Minnesota's 7-foot minimum ceiling height code. Measure carefully and consult with building officials before finalizing plans.
Significantly. Exposed ceilings provide minimal sound blocking (STC 20-30), allowing conversations and footsteps from main floors to be clearly heard in basements. Drywall ceilings with proper insulation achieve STC 40-50, dramatically reducing sound transmission. Drop ceilings with premium acoustic tiles fall between these extremes (STC 35-45).
Yes, but results vary. Flat latex paint works on most tiles, but paint adds weight potentially causing sagging. Test a few tiles first. Consider whether painting saves enough vs. replacing with new tiles (tiles cost $0.50-$8 per sq ft). Old tiles may already show staining or deterioration that paint won't fix.
Drywall with comprehensive sound treatment typically provides optimal performance—STC ratings of 50+ dramatically reduce noise from main floors. However, drop ceilings with premium acoustic tiles (NRC 0.70-0.85) offer excellent performance at lower cost. Both substantially outperform exposed ceilings for home theater applications.
Yes, if ceiling height meets minimum 7-foot code requirements and other building code provisions are satisfied (smoke detectors, proper electrical methods, etc.). Exposed ceilings are legitimate finished-basement approaches, not code violations.
Absolutely. Many homeowners use strategic combinations: drywall in bedrooms and living areas for aesthetics, drop ceilings in mechanical spaces for utility access, exposed approaches in bars or contemporary spaces for design effect. Plan transitions carefully to avoid awkward visual breaks.
Drywall ceilings: 30-50+ years without replacement (occasional repainting needed)Drop ceilings: Grids last 30+ years; tiles may need replacement every 15-25 years depending on quality and humidity conditionsExposed ceilings: Indefinitely—occasional cleaning and touch-up painting maintains appearance
You'll need to cut through drywall, complete repairs, patch holes, texture patches to match existing surfaces, and repaint affected areas. Typical costs: $500-$2,000 per incident depending on damage extent. This expense repeats each time utility access is needed, potentially costing thousands over decades of homeownership.
Yes. Recessed fixtures designed specifically for drop ceiling grids drop into place like tiles, simplifying installation compared to drywall applications. This advantage makes adding lighting or relocating fixtures straightforward in drop ceiling basements.
Drywall ceilings typically contribute most to perceived quality and buyer appeal in South Metro markets, potentially increasing resale values. However, the premium cost of drywall may not be fully recouped at sale. Choose based on your timeline (selling soon vs. long-term home) and overall basement quality level.
Your basement ceiling decision affects appearance, functionality, cost, and comfort for decades. The right choice aligns with your budget, aesthetic vision, and practical requirements.
Here's your action plan:
Step 1: Measure floor-to-joist heights at multiple locations, identifying the lowest points that determine code compliance
Step 2: Assess utility complexity and future modification likelihood, determining how much utility access matters for your specific situation
Step 3: Define clear budget parameters including total basement finishing investment and reasonable ceiling allocation
Step 4: Identify aesthetic preferences and whether resale considerations should influence decisions
Step 5: Work with experienced basement finishing contractors who understand ceiling options and can guide you toward optimal solutions for your specific circumstances
At Country Creek Builders, we've spent 25+ years helping Savage, Lakeville, Apple Valley, and South Metro homeowners navigate ceiling decisions. Our in-house design services evaluate your basement's unique conditions, incorporate your goals and budget constraints, and recommend ceiling approaches that deliver the appearance and functionality you're envisioning.
Whether you choose drop ceilings for practical utility access, drywall for premium aesthetics, exposed ceilings for contemporary appeal, or strategic combinations balancing multiple priorities, we'll ensure your ceiling enhances rather than undermines your basement finishing investment.
Ready to create a basement ceiling that looks great and functions perfectly for your needs? Contact us for a no-pressure consultation where we'll assess your basement, discuss your vision, and show you exactly which ceiling approach makes sense for your project.
Because the right ceiling isn't just what's above your head—it's the foundation of a beautiful, functional finished basement you'll enjoy for decades.
We're based out of the South Metro Twin Cities, and we serve both

.avif)


.avif)